场景:
适用于不方便在设备边操作而又需要修改管理地址的场景。
适用于不方便外接显示器的场景。
注意:
生产环境一定确定好网络配置信息否则可能会因为网络配置不正确导致无法正常访问。
步骤:
1.启用安全Shell(也就是EXSi可以被SSH访问的功能)

2.使用SecureCRT SSH2连接ESXi主机,现在使用dcui并没有任何反应,在Session标签栏右键点击Disconnect。
The time and date of this login have been sent to the system logs.

WARNING:
   All commands run on the ESXi shell are logged and may be included in
   support bundles. Do not provide passwords directly on the command line.
   Most tools can prompt for secrets or accept them from standard input.

VMware offers supported, powerful system administration tools.  Please
see www.vmware.com/go/sysadmintools for details.

The ESXi Shell can be disabled by an administrative user. See the
vSphere Security documentation for more information.
[root@localhost:~]
[root@localhost:~] dcui
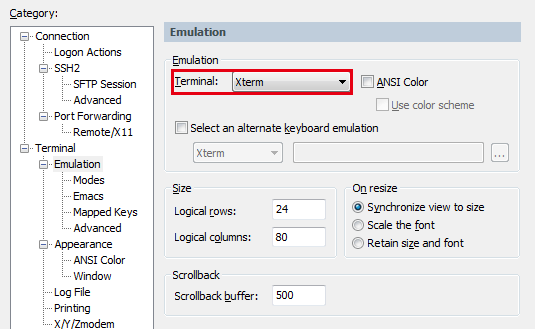
3.在Session标签栏右键点击Session Option修改Terminal类型为Xterm 后重新SSH2连接

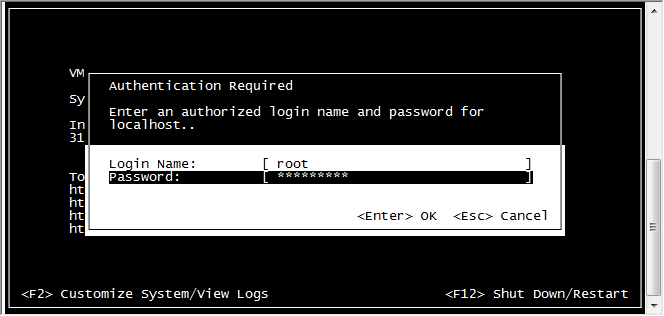
4.再次使用dcui工具,这时已经可以进入EXSi的系统管理界面。

5.点击F2进行Customize System 输入用户名、密码进入

6.选择Configure Management Network

7.选择IPv4 Configuration

8.配置静态IP地址,然后点击回车

9.点击Esc选择Yes应用配置并且重启管理网络

10.此时已近可以用修改后的IP地址登录管理Esxi主机

11.登录后请,重新引导登录,不然会出现强制断电之后,开机又恢复了。重点重点

