
搜索到
33
篇与
的结果
-

-
docker-compose安装 docker-compose官网存放到/usr/local/bin目录下,就不用再修改环境变量了cd /usr/local/bin如果直接下载过慢,建议用其它方式下载再上传wget https://github.com/docker/compose/releases/download/v2.24.7/docker-compose-linux-x86_64修改包名mv /usr/local/bin/docker-compose-linux-x86_64 /usr/local/bin/docker-compose授予执行权限chmod +x /usr/local/bin/docker-compose输入以下命令docker-compose --version返回软件版本即为安装正常
-
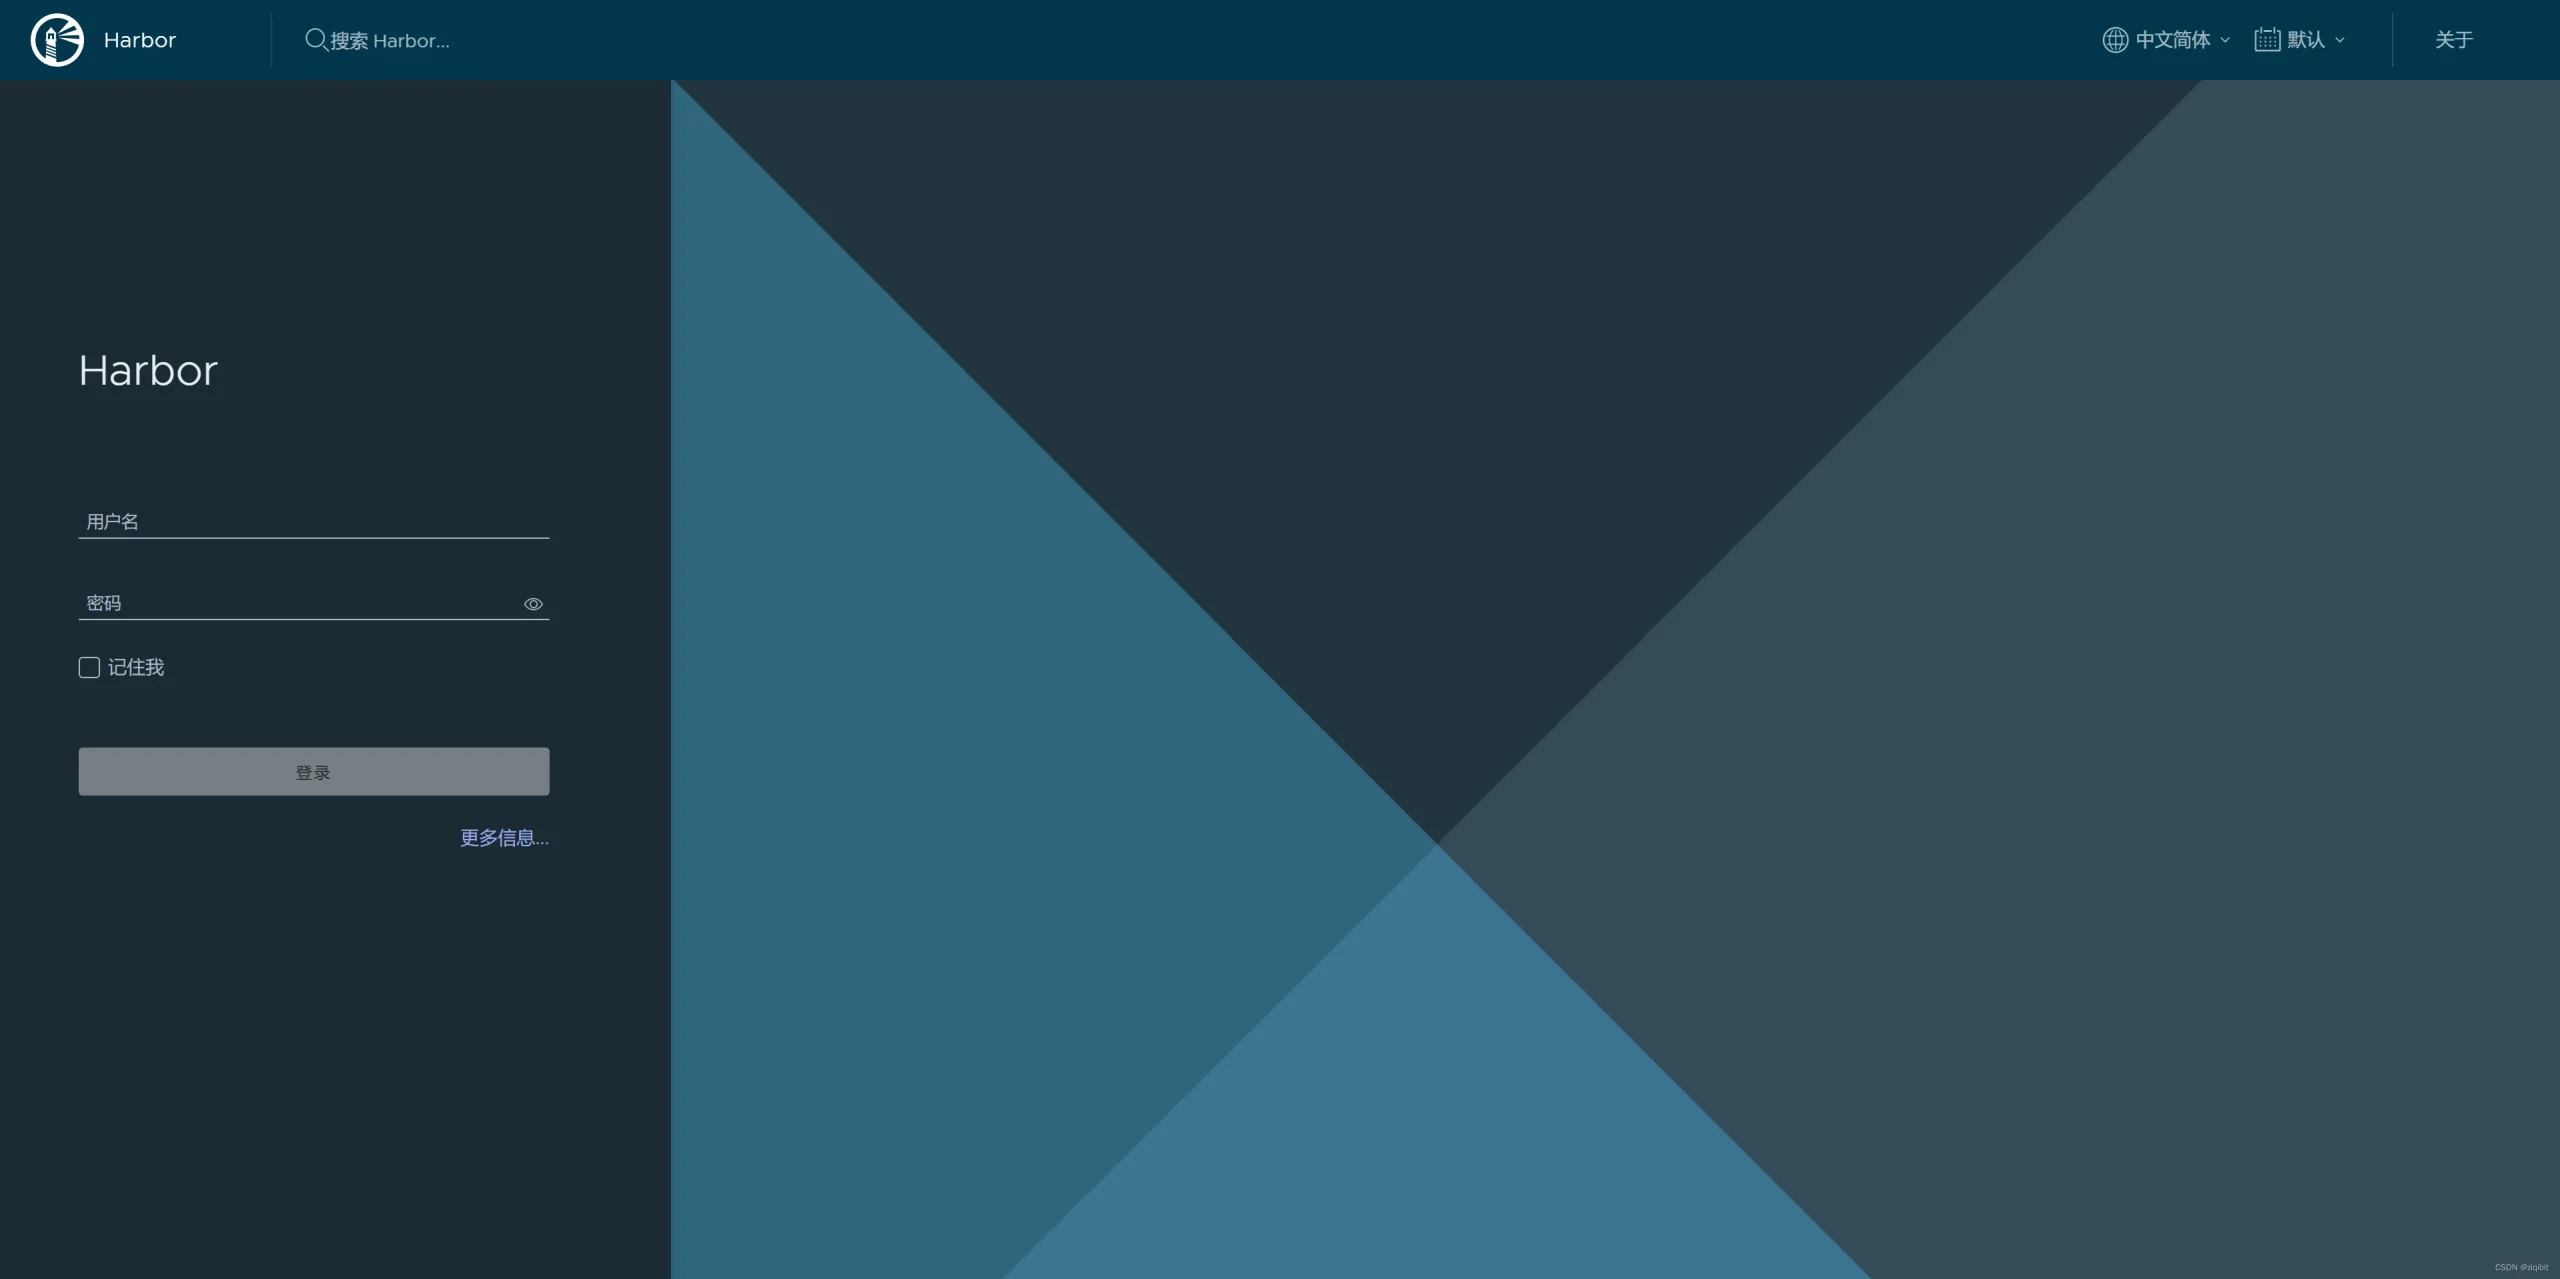
harbor部署(docker hub)+bash一键安装 [blockquote2 name='洛维花']搭建自己的docker hub,适用于内网部署演示版本为2.9.4(2024年4月版本)[/tip]官网: harbor官网: harbor前言需要docker和docker-compose,如果没有安装,可以参考:docker安装docker-compose安装docker hub安装cd /usr/local如果官方下载太慢,建议用下载工具下载并上传到服务器wget https://github.com/goharbor/harbor/releases/download/v2.9.4/harbor-offline-installer-v2.9.4.tgz解压tar -zxvf harbor-offline-installer-v2.9.4.tgz根据自己情况,这里是/var/harbormkdir /var/harbor授权chmod -R 750 /var/harbor复制模板为配置文件cp /usr/local/harbor/harbor.yml.tmpl /usr/local/harbor/harbor.yml编辑vi /usr/local/harbor/harbor.yml详细配置如下:1)hostname改为本机在局域网的ip,比如192.168.0.882)http的port改为设定的harbor的对外服务端口,比如88883)注释所有https的配置(前面加#),包括https、port、certificate、private_key如果使用https,则不要注释4)修改data_volume为上面创建的/var/harbor配置文件可以设置管理员的账号名称,根据需要设置cd /usr/local/harbor ./install.shharbor开机会自动启动[blockquote2 name='洛维花']这个脚本是我上面操作,如果上面手动操作了,就不要用了[/tip]vi /usr/local/harbor.sh修改脚本的常量区域,可以调整安装需要设置本地服务器ip和端口#!/bin/bash # 常量设置 harbor_version="2.9.0" # harbor版本 install_path="/usr/local" # 安装、操作目录 server_ip="192.168.0.88" # 服务ip server_port="8888" # 服务端口 data_path="/var/harbor" # 数据保存目录 data_path2="\/var\/harbor" # 数据保存目录 # 下载harbor源码包,如果下载过慢,注释下面几行代码 echo "......正在下载源码包......" wget -P ${install_path} wget https://github.com/goharbor/harbor/releases/download/v${harbor_version}/harbor-offline-installer-v${harbor_version}.tgz echo "......源码包下载完成......" # 解压缩 echo "......正在解压缩源码包......" cd ${install_path} tar -zxf ${install_path}/harbor-offline-installer-v${harbor_version}.tgz echo "......源码包解压缩完成......" # 创建数据目录 mkdir ${data_path} chmod -R 750 ${data_path} # 配置文件 echo "......正在修改配置文件......" ## 复制配置文件 cp ${install_path}/harbor/harbor.yml.tmpl ${install_path}/harbor/harbor.yml ## 调整配置文件 sed -i 's/data_volume: \/data/data_volume: '"$data_path2"'/g' ${install_path}/harbor/harbor.yml sed -i 's/hostname: reg.mydomain.com/hostname: '"$server_ip"'/g' ${install_path}/harbor/harbor.yml sed -i 's/https:/# https:/g' ${install_path}/harbor/harbor.yml sed -i 's/certificate:/# certificate:/g' ${install_path}/harbor/harbor.yml sed -i 's/private_key:/# private_key:/g' ${install_path}/harbor/harbor.yml sed -i 's/port: 443/# port: 443/g' ${install_path}/harbor/harbor.yml echo "......修改配置文件完成......" ## 启动 /usr/local/harbor/install.sh echo "......!!!脚本运行完成!!!......"保存后sh /usr/local/harbor.sh使用浏览器打开ip:port(每个设备的局域网ip不一样)访问地址上面设置的(这里是192.168.0.88:8888)默认账号:admin 默认密码:Harbor12345(在xml里面配置)系统管理——用户管理——创建用户如果用域名,需要配置ssl证书,证书将保存的目录写道xml里面即可二、卸载docker stop $(docker ps -a | grep "goharbor" | awk '{print $1}')docker rm $(docker ps -a | grep "goharbor" | awk '{print $1}')docker rmi $(docker images | grep "goharbor" | awk '{print $1":"$2}')然后删除下载的harbor安装包
-
mac,macOS下的l2tp,如何设置指定流量,而不是全局 注意网络有优先级服务顺序,开启L2TP VPN后发现无效,内网还是访问不了,但是设置L2TP为第一个服务顺序的话就可以访问。可是这样的话,如果内网不具备访问互联网的功能的话,就会导致我们电脑也不会有网,只能访问内网。每次需要访问互联网的时候就需要关闭VPN,来来回回切换就会体验很不好。开工设置本文代码来自:Github先设置一下设置 -> 网络 -> 目标VPN -> 高级 -> 取消勾选通过VPN连接发送所有流量黑名单模式在mac终端中:sudo vi /etc/ppp/ip-up添加以下内容:#!/bin/sh export PATH="/bin:/sbin:/usr/sbin:/usr/bin" OLDGW=`netstat -nr | grep 'ppp0' | grep 'UH ' | sed 's/ \([0-9.]*\).*/\1/g'` if [ ! -e /tmp/pptp_oldgw ]; then echo "${OLDGW}" > /tmp/pptp_oldgw fi dscacheutil -flushcache route add 192.168.8.0/16 "${OLDGW}" # 更改这里的ip段sudo vi /etc/ppp/ip-down添加以下内容:#!/bin/sh export PATH="/bin:/sbin:/usr/sbin:/usr/bin" if [ ! -e /tmp/pptp_oldgw ]; then exit 0 fi OLDGW=`cat /tmp/pptp_oldgw` route delete 106.75.0.0/16 ${OLDGW} # 更改这里的ip段 rm /tmp/pptp_oldgw完结重启电脑,重新链接vpn。注意事项如果刚开始已勾选通过VPN连接发送所有流量,建议重新创建vpn,我测试下取消勾选不会生效需要追加规则直接在两个脚本内追加ip,然后重连即可出现问题检查流程:改完规则是否重连VPNnetstat -nr,检查脚本内的路由规则是否已添加ls -l /etc/ppp,检查脚本文件是否可执行
-
WordPress两种方法实现上传媒体图片文件自动重命名 我们发布文章时,会上传一些图片、音频之类的文件。但是WordPress没有自动 给新上传文件重命名的功能,逐个文件去重命名那就太麻烦了,那么我们改如何自动给上传的媒体文件图片重命名呢?我在网站搜索了些上WordPress上传媒体文件自动重命名的WordPress教程,说法不一,方法也多种多样,于是整理了下,希望能方便大家以后使用。方法一: 按上传时间自动重命名//WordPress上传文件重命名 function git_upload_filter($file) { $time = date("YmdHis"); $file['name'] = $time . "" . mt_rand(1, 100) . "." . pathinfo($file['name'], PATHINFO_EXTENSION); return $file; } add_filter('wp_handle_upload_prefilter', 'git_upload_filter');二、用MD5加密生成数字并重命名//WordPress上传文件重命名 function rename_filename($filename) { $info = pathinfo($filename); $ext = emptyempty($info['extension']) ? '' : '.' . $info['extension']; $name = basename($filename, $ext); return substr(md5($name), 0, 20) . $ext; } add_filter('sanitize_file_name', 'rename_filename', 10);使用方法将上面两段代码其中一段添加到主题的functions.php 文件中即可。
-
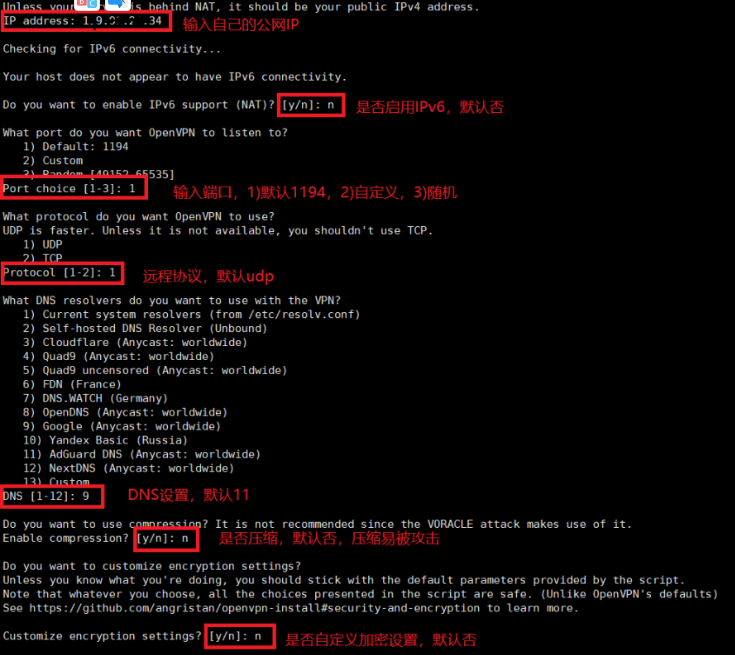
【openvpn系列一】安装并设置openvpn,设置OpenVPN访问公司内网,图文详细 简介当在外办公时,有些服务器需要公司内网才可以访问,所以这时候可以设置openVPN连接访问公司内网服务器。openVPN 手工搭建,设置非常复锁,本人手工设置一次,不想设置第二次。所以可以采用脚本快速搭建访问公司内网,以下推荐两个脚本,都是github使用比较多且正规的脚本,个人推荐第二个脚本,设置选项更多(如连接加密)。github脚本下载地址1:https://github.com/Nyr/openvpn-installgithub脚本下载地址2:https://github.com/angristan/openvpn-install下载安装简单方便,一句命令即可安装,根据提示选择即可:#下载 curl -O https://raw.githubusercontent.com/angristan/openvpn-install/master/openvpn-install.sh #添加执行权限 chmod +x openvpn-install.sh #执行脚本 ./openvpn-install.sh或者直接用git clone,获取整个包,然后进入文件夹执行脚本即可:#下载 git clone git@github.com:angristan/openvpn-install.git #执行脚本 bash openvpn-install/openvpn-install.sh相关选项,自己选择即可完成后,最后设置添加用户,添加完成后,请自行下载连接文件至电脑中。我这里xshell直接用sz命令下载的,有些远程ssh工具不支持sz命令。安装完安装完成,再次运行脚本,可选择 1)添加用户 2)移除已存在的用户 3)协助软件 4)退出客户端连接下载地址:官方客户端下载官方客户端 https://openvpn.net/vpn-client/安装完成后,导入文件开始连接,查看IP地址连接成功!!!注意的坑:根据自己服务器商,有些有默认的防火墙,需要自己添加1194端口,或者自己设置的端口。如腾讯云需要添加防火墙。否则连接失败。
-
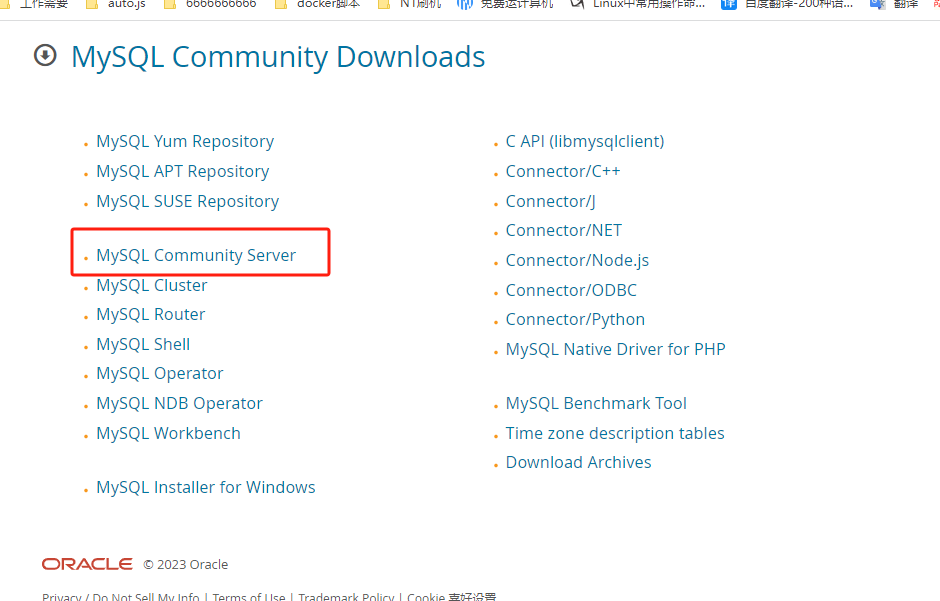
【环境安装记录指定Mysql版本篇】CentOS7 离线安装mysql8数据库 第一步:下载离线安装包下载地址:https://dev.mysql.com/downloads/第二步:上传下载包到服务器上传文件mysql-8.0.18-1.el7.x86_64.rpm-bundle.tar到服务器上。第三步:解压文件包切换到上传文件目录下运行如下命令:[root@gelong-vm1 rpms]# tar -vxf mysql-8.0.18-1.el7.x86_64.rpm-bundle.tar mysql-community-libs-8.0.18-1.el7.x86_64.rpm mysql-community-devel-8.0.18-1.el7.x86_64.rpm mysql-community-embedded-compat-8.0.18-1.el7.x86_64.rpm mysql-community-libs-compat-8.0.18-1.el7.x86_64.rpm mysql-community-common-8.0.18-1.el7.x86_64.rpm mysql-community-test-8.0.18-1.el7.x86_64.rpm mysql-community-server-8.0.18-1.el7.x86_64.rpm mysql-community-client-8.0.18-1.el7.x86_64.rpm 第四步:卸载系统自带的数据库1.检查系统自带的 MariaDB检查系统是否自带MariaDB,命令如下:rpm -qa | grep mariadb如果系统自带MariaDB,删除掉,删除命令如下:rpm -e --nodeps mariadb-libs-5.5.44-2.el7.centos.x86_642.检查系统自带的mysql数据库安装包检查系统是否自带Mysql数据库,名利如下:rpm -qa | grep mysql如果系统自带mysql数据库,删除掉,删除命令如下:rpm -e --nodeps mysql-libs-5.1.73-8.el6_8.x86_64第五步:按照顺序安装mysql数据库按照如下顺序安装:rpm -ivh mysql-community-common-8.0.18-1.el7.x86_64.rpm rpm -ivh mysql-community-libs-8.0.18-1.el7.x86_64.rpm rpm -ivh mysql-community-client-8.0.18-1.el7.x86_64.rpm rpm -ivh mysql-community-server-8.0.18-1.el7.x86_64.rpm rpm -ivh mysql-community-devel-8.0.18-1.el7.x86_64.rpm1.安装mysql-community-server-8.0.18-1.el7.x86_64.rpm 报错解决方案安装 mysql-community-server-8.0.18-1.el7.x86_64.rpm 的时候需要依赖 net-tools,如果没有 net-tools 会安装失败,此时先安装 net-tools,然后再安装 mysql-community-server-8.0.18-1.el7.x86_64.rpm 即可,安装命令如下:# 安装 mysql-community-server-8.0.25-1.el7.x86_64.rpm 依赖报错 [root@sangni mysql-installation]# rpm -ivh mysql-community-server-8.0.25-1.el7.x86_64.rpm 警告:mysql-community-server-8.0.25-1.el7.x86_64.rpm: 头V3 DSA/SHA1 Signature, 密钥 ID 5072e1f5: NOKEY 错误:依赖检测失败: net-tools 被 mysql-community-server-8.0.25-1.el7.x86_64 需要 # 安装 net-tools [root@sangni mysql-installation]# yum install net-tools 已加载插件:fastestmirror Loading mirror speeds from cached hostfile * base: mirrors.njupt.edu.cn * extras: mirrors.njupt.edu.cn * updates: mirrors.njupt.edu.cn 正在解决依赖关系 --> 正在检查事务 ---> 软件包 net-tools.x86_64.0.2.0-0.25.20131004git.el7 将被 安装 --> 解决依赖关系完成 依赖关系解决 ================================================================================================================================== Package 架构 版本 源 大小 ================================================================================================================================== 正在安装: net-tools x86_64 2.0-0.25.20131004git.el7 base 306 k 事务概要 ================================================================================================================================== 安装 1 软件包 总下载量:306 k 安装大小:917 k Is this ok [y/d/N]: y Downloading packages: net-tools-2.0-0.25.20131004git.el7.x86_64.rpm | 306 kB 00:00:00 Running transaction check Running transaction test Transaction test succeeded Running transaction 警告:RPM 数据库已被非 yum 程序修改。 ** 发现 2 个已存在的 RPM 数据库问题, 'yum check' 输出如下: 2:postfix-2.10.1-9.el7.x86_64 有缺少的需求 libmysqlclient.so.18()(64bit) 2:postfix-2.10.1-9.el7.x86_64 有缺少的需求 libmysqlclient.so.18(libmysqlclient_18)(64bit) 正在安装 : net-tools-2.0-0.25.20131004git.el7.x86_64 1/1 验证中 : net-tools-2.0-0.25.20131004git.el7.x86_64 1/1 已安装: net-tools.x86_64 0:2.0-0.25.20131004git.el7 完毕! # net-tools 安装完成后再次安装 mysql-community-server-8.0.25-1.el7.x86_64.rpm [root@sangni mysql-installation]# rpm -ivh mysql-community-server-8.0.25-1.el7.x86_64.rpm 警告:mysql-community-server-8.0.25-1.el7.x86_64.rpm: 头V3 DSA/SHA1 Signature, 密钥 ID 5072e1f5: NOKEY 准备中... ################################# [100%] 正在升级/安装... 1:mysql-community-server-8.0.25-1.e################################# [100%]2.安装 rpm -ivh mysql-community-devel-8.0.18-1.el7.x86_64.rpm 报错解决方案[root@192 mysql]# rpm -ivh mysql-community-devel-8.0.18-1.el7.x86_64.rpm warning: mysql-community-devel-8.0.25-1.el7.x86_64.rpm: Header V3 DSA/SHA256 Signature, key ID 5072e1f5: NOKEY error: Failed dependencies: pkgconfig(openssl) is needed by mysql-community-devel-8.0.25-1.el7.x86_64解决办法yum install openssl-devel特别说明:关于mysql8之后的大小写问题在MySQL8中,数据目录初始化之后,不再允许更改lower_case_table_names=1的值;也就是说启动(重启)MYSQL时,lower_case_table_names的值必须于,初始化MYSOL时(安装 MYSOL后的首次启动)的值相同。由于我的业务是有需求的,所以我先设置关闭大小写验证 #进入目录 cd /etc/ #编辑my.cnf文件 vi /etc/my.cnf #添加内容 lower_case_table_names=1通常,0 表示大小写敏感,1 表示大小写不敏感。相关文章:CentOS 上查看 MySQL 的大小写敏感状态centos 安装MySQL 8.0 区分大小写解决方法第六步:启动mysql服务1.启动MYSQL服务:[root@gelong-vm1 rpms]# service mysqld start Redirecting to /bin/systemctl start mysqld.service2.查看启动状态:[root@gelong-vm1 rpms]# systemctl status mysqld.service ● mysqld.service - MySQL Server Loaded: loaded (/usr/lib/systemd/system/mysqld.service; enabled; vendor preset: disabled) Active: active (running) since 二 2023-09-05 14:19:46 CST; 38s ago Docs: man:mysqld(8) http://dev.mysql.com/doc/refman/en/using-systemd.html Process: 15236 ExecStartPre=/usr/bin/mysqld_pre_systemd (code=exited, status=0/SUCCESS) Main PID: 15315 (mysqld) Status: "Server is operational" CGroup: /system.slice/mysqld.service └─15315 /usr/sbin/mysqld 9月 05 14:19:34 gelong-vm1 systemd[1]: Starting MySQL Server... 9月 05 14:19:46 gelong-vm1 systemd[1]: Started MySQL Server.第七步:修改默认密码开启远程连接1.查看默认密码:查看默认密码命令如下[root@gelong-vm1 rpms]# grep 'temporary password' /var/log/mysqld.log 2023-09-05T06:19:39.121134Z 6 [Note] [MY-010454] [Server] A temporary password is generated for root@localhost: iU/%Q(3w<AO*2.使用默认密码登录mysql:[root@gelong-vm1 rpms]# mysql -u root -p Enter password: Welcome to the MySQL monitor. Commands end with ; or \g. Your MySQL connection id is 8 Server version: 8.0.23 Copyright (c) 2000, 2021, Oracle and/or its affiliates. Oracle is a registered trademark of Oracle Corporation and/or its affiliates. Other names may be trademarks of their respective owners. Type 'help;' or '\h' for help. Type '\c' to clear the current input statement.3.修改 root 用户密码:注意:这里修改的密码要足够复杂,包含大小和特殊符号;mysql> alter user 'root'@'localhost' identified by 'Houpu123!@#'; Query OK, 0 rows affected (0.62 sec) mysql> select version(); +-----------+ | version() | +-----------+ | 8.0.23 | +-----------+ 1 row in set (0.00 sec)4.修改 root 用户的 host 列值,开启远程连接:修改运行远程连接命令如下:mysql> use mysql; Reading table information for completion of table and column names You can turn off this feature to get a quicker startup with -A Database changed mysql> UPDATE user SET `Host` = '%' WHERE `User` = 'root' LIMIT 1; Query OK, 1 row affected (0.01 sec) Rows matched: 1 Changed: 1 Warnings: 0 mysql> select host from user; +-----------+ | host | +-----------+ | % | | localhost | | localhost | | localhost | +-----------+ 4 rows in set (0.00 sec)5.刷新缓存:重新刷新mysql的缓存内容命令:mysql> flush privileges; Query OK, 0 rows affected (0.47 sec) 6.给 root 用户授予所有权限:mysql> GRANT ALL PRIVILEGES ON *.* TO 'root'@'%'WITH GRANT OPTION; Query OK, 0 rows affected (0.02 sec) 解决远程连接时报错2059-Authentication plugin ‘caching_sha2_password‘安装的时候,选择了强加密规则caching_sha2_password,与之前的mysql的mysql_native_password规则不同,navicate驱动目前不支持新加密规则通过更改加密规则和刷新权限的方式 use mysql; #选择数据库 # 远程连接请将'%'换成'localhost' ALTER USER 'root'@'%' IDENTIFIED BY 'password' PASSWORD EXPIRE NEVER; #更改加密方式 ALTER USER 'root'@'%' IDENTIFIED WITH mysql_native_password BY 'password'; #更新用户密码 FLUSH PRIVILEGES; #刷新权限8.退出mysql控制台:exit;
-
qbittorrent搜索在线插件 https://raw.githubusercontent.com/khensolomon/leyts/master/yts.py https://raw.githubusercontent.com/solenskiner/search-plugins/master/nova3/engines/academictorrents.py https://raw.githubusercontent.com/hannsen/qbittorrent_search_plugins/master/ali213.py https://raw.githubusercontent.com/hannsen/qbittorrent_search_plugins/master/threedm.py https://raw.githubusercontent.com/lima66/Torrents_Plugin/master/btetree.py https://raw.githubusercontent.com/MaurizioRicci/qBittorrent_search_engine/master/cinecalidad.py https://raw.githubusercontent.com/davy39/qbfrench/master/cpasbien.py https://raw.githubusercontent.com/hannsen/qbittorrent_search_plugins/master/demonoid.py https://github.com/xyauhideto/DMHY_qBittorrent_search_plugin/raw/master/dmhyorg.py https://raw.githubusercontent.com/MaurizioRicci/qBittorrent_search_engine/master/ettv.py https://raw.githubusercontent.com/MaurizioRicci/qBittorrent_search_engine/master/extratorrent.py https://raw.githubusercontent.com/nindogo/qbtSearchScripts/master/idope.py https://raw.githubusercontent.com/MaurizioRicci/qBittorrent_search_engine/master/corsaroblu.py https://raw.githubusercontent.com/MaurizioRicci/qBittorrent_search_engine/master/corsaronero.py https://raw.githubusercontent.com/MaurizioRicci/qBittorrent_search_engine/master/kickass_torrent.py https://raw.githubusercontent.com/MadeOfMagicAndWires/qBit-plugins/6074a7cccb90dfd5c81b7eaddd3138adec7f3377/engines/linuxtracker.py https://raw.githubusercontent.com/nindogo/qbtSearchScripts/master/magnetdl.py https://raw.githubusercontent.com/MaurizioRicci/qBittorrent_search_engine/master/mejor.py https://raw.githubusercontent.com/nindogo/qbtSearchScripts/master/mkvcage.py https://raw.githubusercontent.com/4chenz/pantsu-plugin/master/pantsu.py https://raw.githubusercontent.com/MadeOfMagicAndWires/qBit-plugins/master/engines/nyaapantsu.py https://raw.githubusercontent.com/MadeOfMagicAndWires/qBit-plugins/master/engines/nyaasi.py https://raw.githubusercontent.com/Pireo/hello-world/master/rockbox.py https://raw.githubusercontent.com/Pireo/hello-world/master/rutor.py https://gist.githubusercontent.com/kernc/67c939c57edb7dd057b3abf9f159598a/raw/09c0099fc8cd8bd2326e5881a8f77c2dffb8e16b/skytorrents.py https://raw.githubusercontent.com/hannsen/qbittorrent_search_plugins/master/smallgames.py https://raw.githubusercontent.com/gitDew/qbittorrent-snowfl-search-plugin/master/snowfl.py https://raw.githubusercontent.com/MaurizioRicci/qBittorrent_search_engine/master/solotorrent.py https://raw.githubusercontent.com/phuongtailtranminh/qBittorrent-Nyaa-Search-Plugin/master/nyaa.py https://raw.githubusercontent.com/4chenz/pantsu-plugin/master/sukebei.py https://raw.githubusercontent.com/ngosang/qBittorrent-plugins/master/sumotorrent/sumotorrent.py https://raw.githubusercontent.com/ngosang/qBittorrent-plugins/master/tntvillage/tntvillage.py https://raw.githubusercontent.com/BrunoReX/qBittorrent-Search-Plugin-TokyoToshokan/master/tokyotoshokan.py https://raw.githubusercontent.com/CravateRouge/qBittorrentSearchPlugins/master/torrent9.py https://raw.githubusercontent.com/MaurizioRicci/qBittorrent_search_engine/master/torrentfunk.py https://raw.githubusercontent.com/nindogo/qbtSearchScripts/master/uniondht.py https://raw.githubusercontent.com/nindogo/qbtSearchScripts/master/yourbittorrent.py https://raw.githubusercontent.com/MadeOfMagicAndWires/qBit-plugins/master/engines/bakabt.py https://raw.githubusercontent.com/adrianmocan/qbittorrent_plugin_filelist.ro/master/filelist_ro/filelist.py https://raw.githubusercontent.com/hannsen/qbittorrent_search_plugins/master/jackett.py https://raw.githubusercontent.com/Skymirrh/qBittorrent-rutracker-plugin/master/rutracker.py https://raw.githubusercontent.com/alvin1979/qbrutracker/master/qbrutracker.py https://raw.githubusercontent.com/CravateRouge/qBittorrentSearchPlugins/master/yggtorrent.py